
Task Assignment reports filter results for tasks with the emphasis on the resources assigned to those tasks.
If you are looking for a Task-centric report (e.g. Show me all the tasks in Project XYZ) then you may want to create a Task Report.
Task Assignment reports are Resource-centric but both reports overlap many of the same results.
Create a Task Assignment Report
In the Reports home of Project Insight, Task Assignment Report is the second option under Task reports:

Click the Create Task Assignment Report button to get started.
Display & Filter Options
Filter for the desired Task results
Like all reports in Project Insight, you first narrow down which types of tasks you want to see from the following filtering criteria:

- Keywords search looks for item names for a quick search using the same parameters as the Advanced Search but filtered to Task items only
- Date Range Options filter out projects that fall within certain date ranges
- Companies will narrow the results to only project associated with a specific company
- Task Options can narrow by Project Type or select projects by their specific name
Special Filtering Options for Tasks
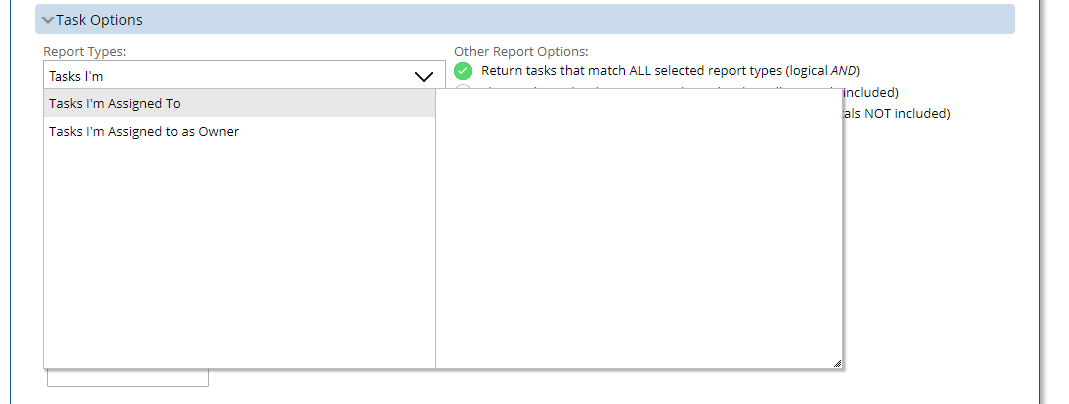
Report Types are super powerful for dynamic reporting.
In the example below, if you choose "Tasks I'm Assigned To" the report will filter based on who runs the report.
If Jill runs the report, she'll see Tasks she's assigned to, and if Joe runs the report, he'll see his tasks, etc.
What information do you want to know about those projects?
The next set of options asks which data fields are important to you.

Charting will add up to four charts to display line graphs, bar charts, or pie charts.
Group By & Sub Totals sort order, roll-up information, and organize your results.
Using the Columns tutorial is already in the Page Display Options article, but these columns are every possible reportable field in Project Insight. Some are entered by the user and others are calculated.
Results
When you're finished, run the report to see the results:

If using Group Bys, use the triangle carats to expand and collapse according to your Group By selections.
Quick Tip: Use the Tools icon to expand/collapse rows all at once:

Save, Share & Schedule
Continue reading the following articles for using the ![]() options at the bottom of ALL reports:
options at the bottom of ALL reports:
Comments
0 comments
Please sign in to leave a comment.